Creating a line-overlay for your Podium render
Superimposing a line-overlay from SketchUp over a rendered image is a fast and effective method to add stronger edges to your model or create an artistic/stylized final image. This is a simple procedure, requiring just three steps.
- Create a render with SU Podium.
- Export a line-overlay from SketchUp using exactly the same resolution as the Podium render.
- Superimpose the line-overlay on the Podium render using Podium Image Editor or Photoshop.
Tip — Create a SketchUp Scene for the camera view you want to render. The line overlay must have exactly the same angle and resolution as your render, so creating a scene gives you a way to return to a specific camera angle if you accidently move the camera.
1. Create a render with SU Podium
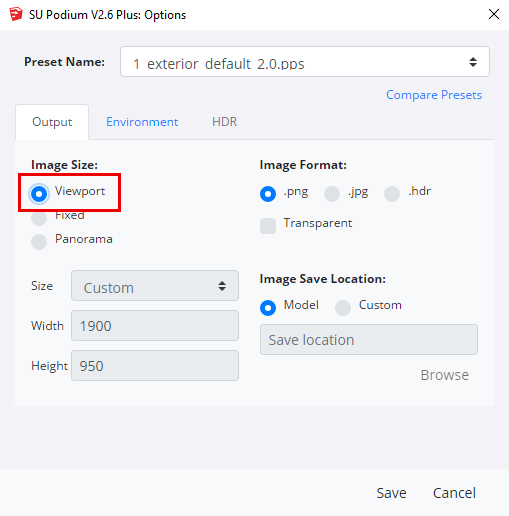
Use SU Podium to render an image, and make note of the image size you choose.
The easiest method is to choose the viewport option to render exactly what you see in the SketchUp viewport.
Any custom resolution can be used, but it is very important that the image size of the line-overlay matches the image size of the render.
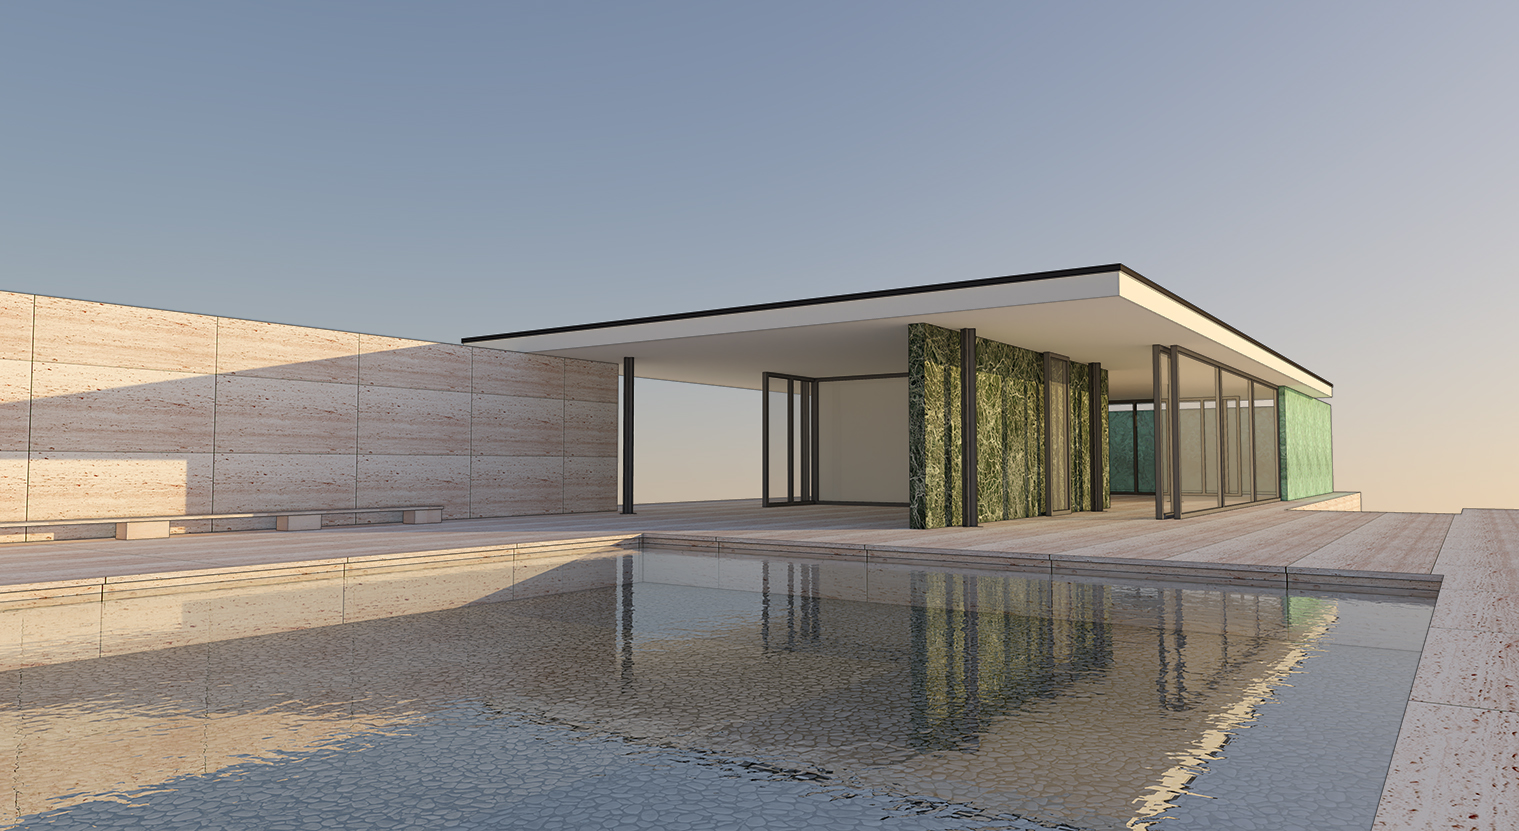
Here is the SU Podium image, rendered at viewport resolution:
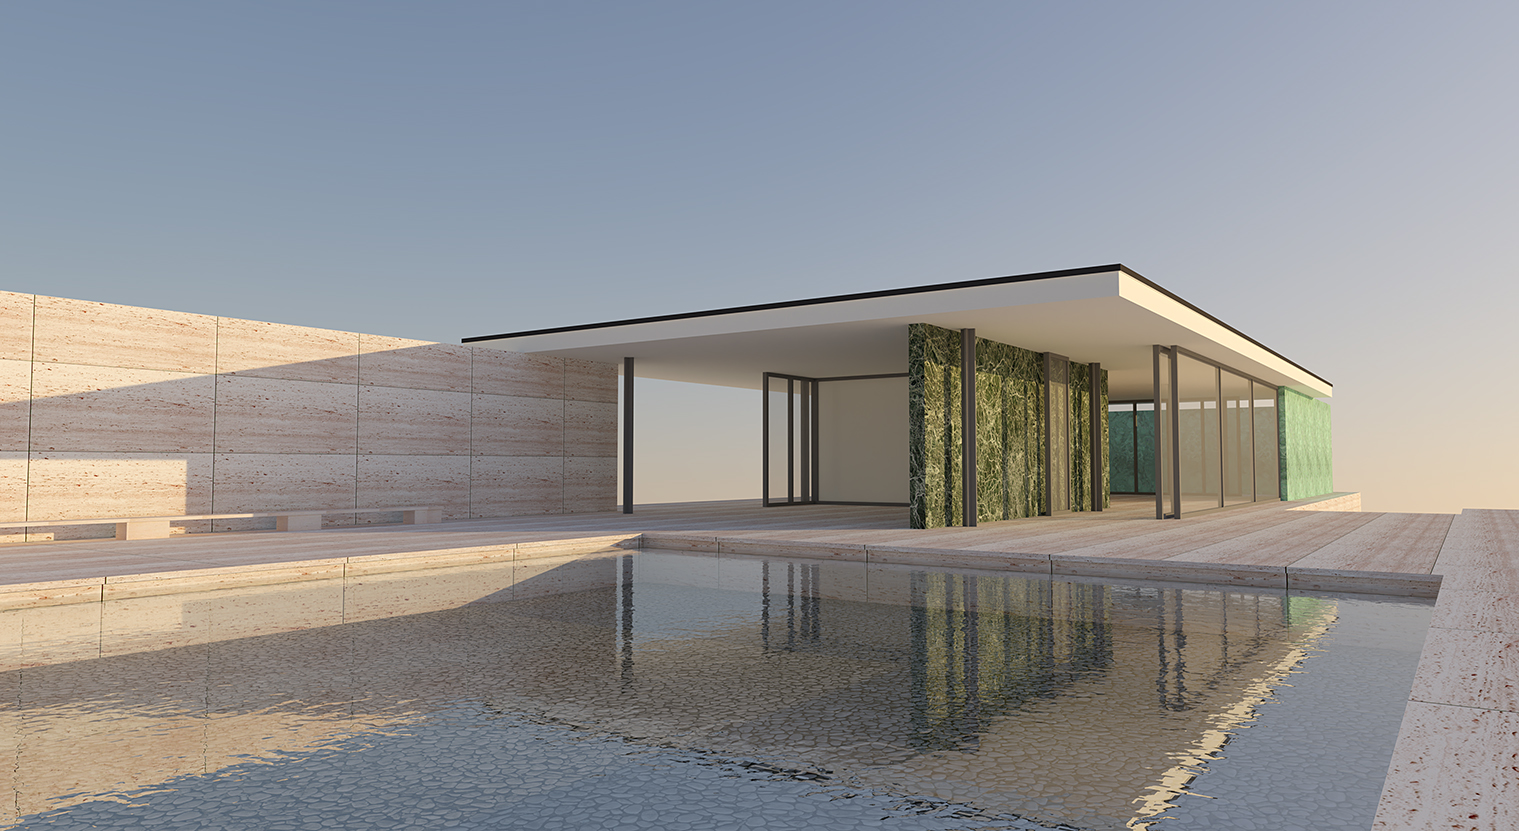
Image size: 1519 x 831.
2. Switch to Hidden Line style in SketchUp
Switch to a white SketchUp background without sky, ground, or shadows. A fast way to accomplish this is to go to SketchUp Styles and in the Select tab choose Default SketchUp styles. Then choose the “Hidden Line” style.
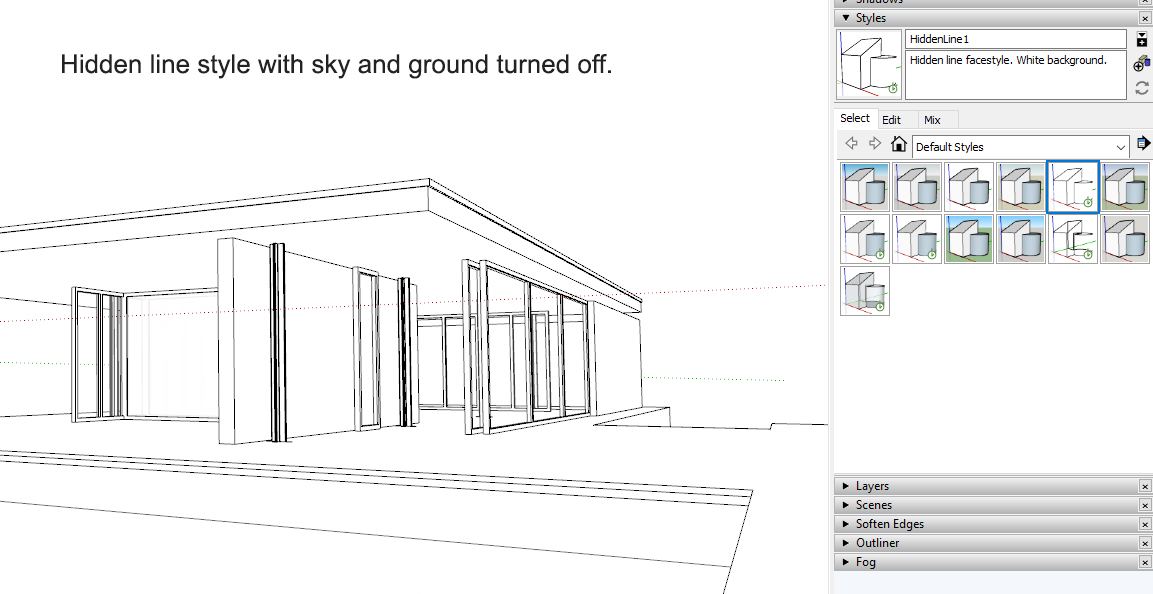
Use the Edit tab in the styles palette to turn off Sky and Ground. You can also edit line thickness and profiles to your liking. Make sure shadows are disabled.
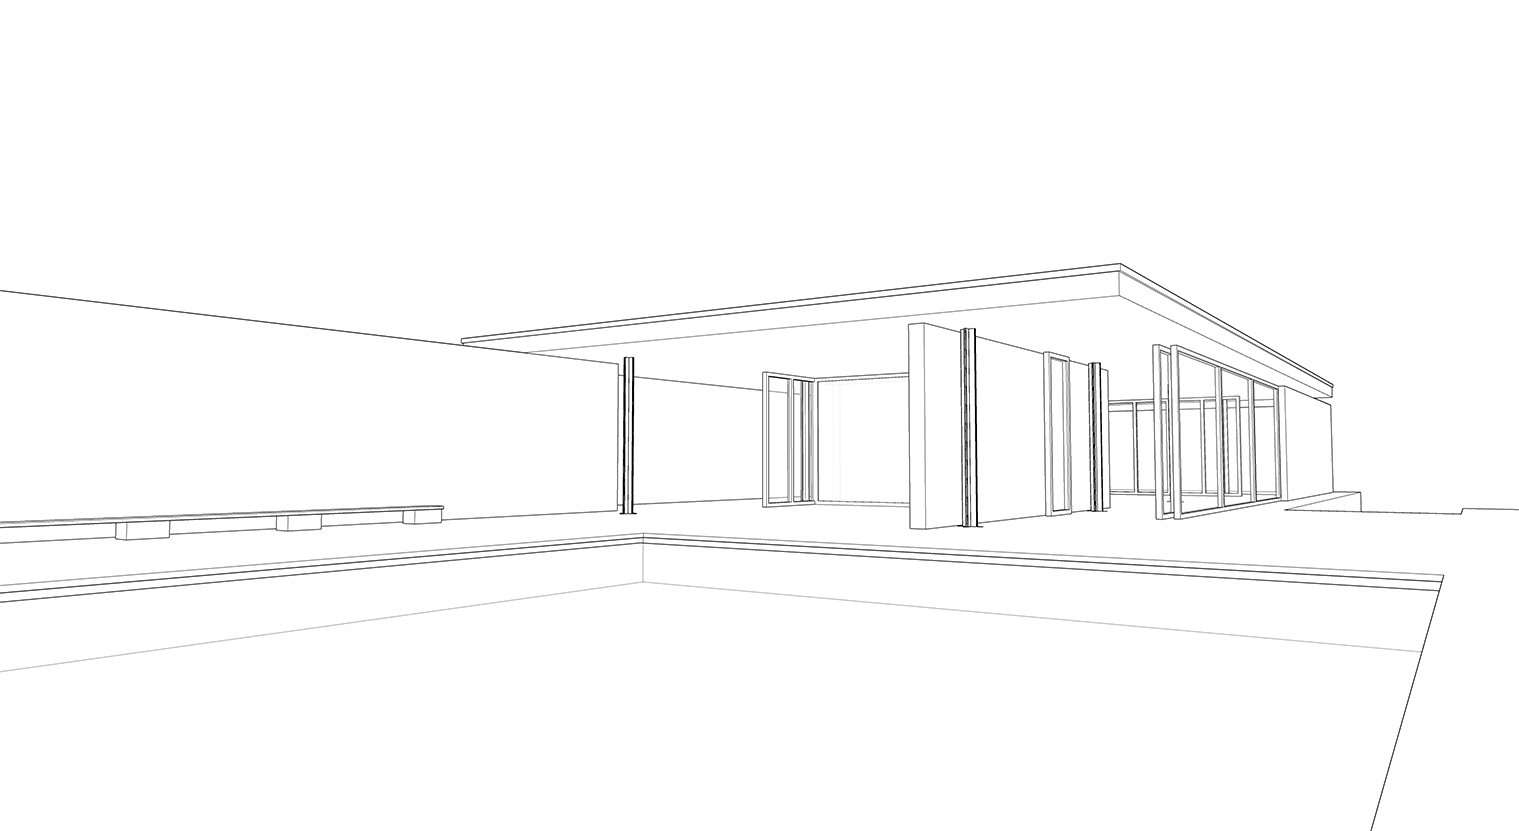
Here is the line-overlay export from SketchUp
3. Export the image from SketchUp
To export your SketchUp viewport as a 2D image, use the following command:
File Export 2D Graphic
Choose JPG or PNG and click the options button to bring up the image export options.
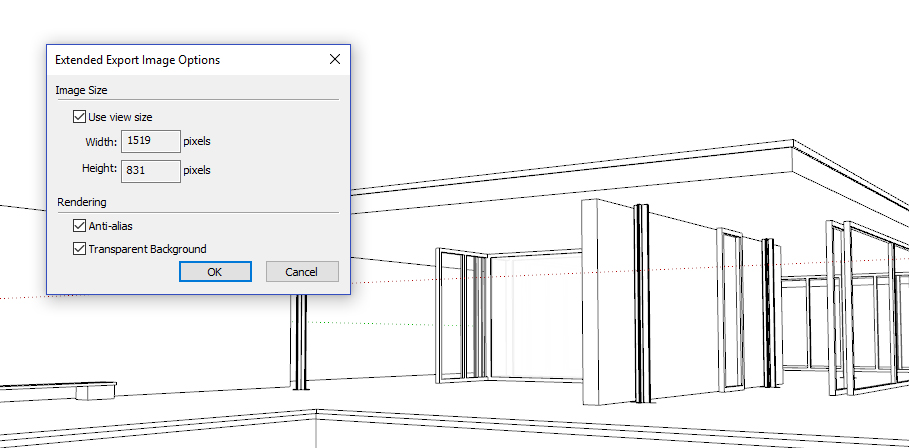
Make sure anti-alias is checked. Check the "use view size" option to match the line-overlay to the size of the render. (See below for further information about image size).
Here is what the 2D "hidden line" export from SketchUp looks like:
Tip — SketchUp's image exporter produces much cleaner anti-aliasing at high resolutions. Our recommendation to get a high quality line-overlay is to export the line-overlay much larger than you need and then scale it down to match the render.
For example instead of checking "use view size" I would uncheck that option and export the line-overlay at 4000 x 2188. Then I can resize the line overlay to 1519 x 831 to match the Podium render.
4. Overlay the lines with Podium image editor
Open your render in Podium Image Editor. If OOPR is still open, just click edit. If not, open PIE manually from Extensions > SU Podium V2.6 Plus > Tools > Image Editor.
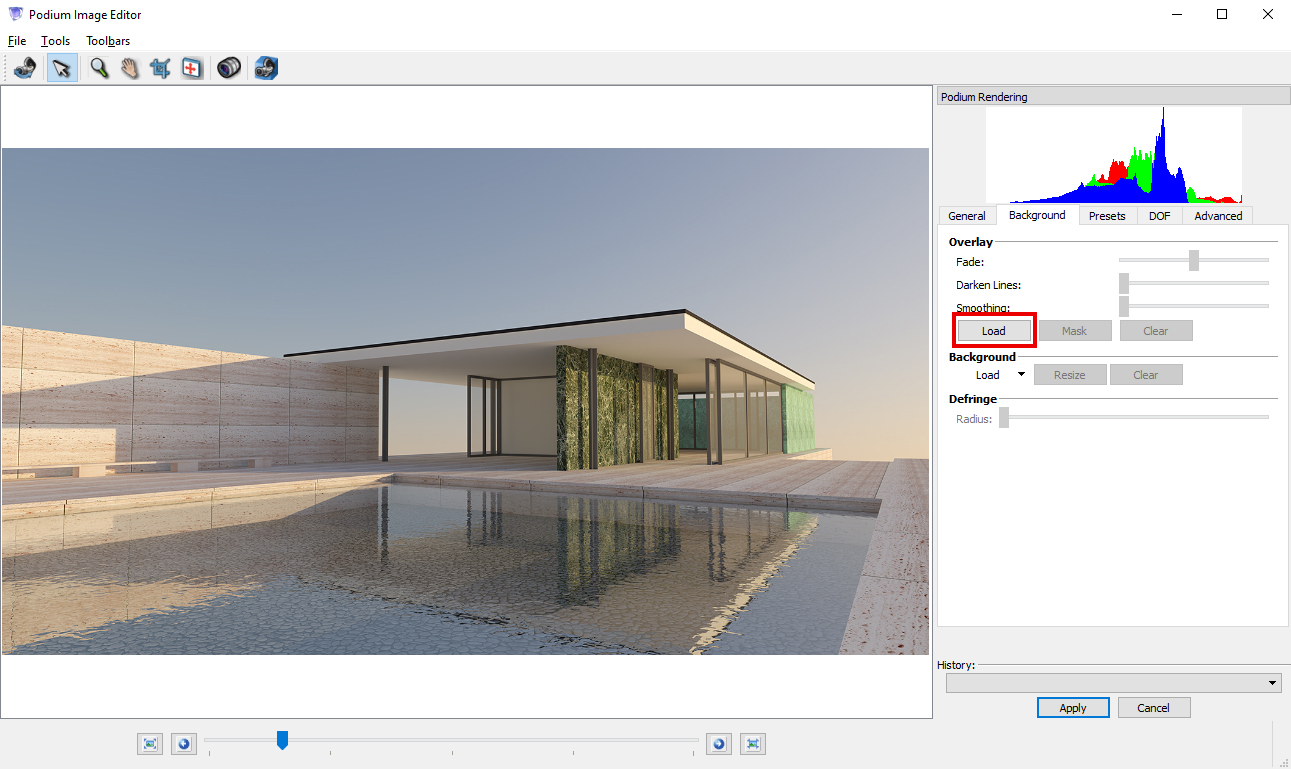
To create the final line-overlay composite in PIE:
- Switch to the background tab (pictured above)
- Click Load and navigate to the 2D line overlay. The overlay is loaded at 50% opacity—note the "washed out" effect in the white portions of the overaly.
- Mask - Click Mask to filter out the white portions of the overlay, and restore the render to its original tone/brightness.
- Fade - This is an opacity slider for the overlayed image—adjust the intensity of the line-overlay to your desired value.
- Darken and Smooth - These sliders allow users to fine-tune the overlay. Smooth applies a slight gaussian blur to the line overlay to counteract any jagged artifacts present in the mask. Darken multiplies the line-overlay effect for more emphasis.
Here's the finished render with a subtle line overlay:
